BurdaStyle #6060: The Kiki Dress
Though I've been sewing since the summer, the Kiki dress (see variation here) is the first official pattern I'm attempting, which might not be the greatest idea since its difficulty rating is 'Advanced', but I'm stubborn and perhaps a bit overly confident in my ability to figure more complex techniques out, with the help of my Reader's Digest sewing book, of course. I have read quite a few pages with the solitary goal of getting familiar with general sewing techniques so that when the time comes to really make something, I wouldn't be psychologically drowning in construction. With a super-vintage book of my father's, I've also attempted drafting slopers from my body measurements (slopers are the most basic flat pattern, fit to your body, from which other styles can be created), with moderate but not wearable success.
So, I think I'm somewhat qualified to try Kiki. I'm on my second test bodice right now, taking photos as I go along, with the hope of creating a tutorial for the specific dress but also in basic garment construction, a bit of pattern alteration, and, very importantly, working with chiffon. I'm using a cheap polyester chiffon for my test bodices with the hope of creating a silk chiffon bodice and maybe cotton silk blend for the skirt. There are a lot of great tips out there, notably on about.com, but I don't have some of the recommended supplies like a padded cutting board, mercerized cotton thread, fine needles, or spray adhesive. I'm trying to work with what I have, so I want to publish all my findings once I'm happy with the final product.
For now, here are some photos of the process!

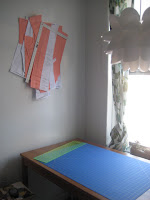
my sewing/dining area


my measurements, carefully detailed. as you can see, my measurements are all over the place! alterations strongly desired.


trying to alter the armscye (armhole) to fit a larger sleeve for my massive biceps :)

experimenting with tissue paper to prevent the slipping characteristic of chiffon

trying to hold the pleats of the bodice shaping. my makeshift technique!

shoulder seams sewed. i attempted french seams, which came out fine, but one is on the wrong side. good thing it's a test garment!

pattern alteration skills need some work. back armscye longer than front. like a bad seamstress, i just cut off the excess. seems to work pretty well (for now, but not acceptable for my final garment)

attaching sleeve cap to armscye. wow.

the real test - the fit! i like the fit at the sleeve cap but the bodice is a bit wide. not bad, though. looks like some bra loops will be necessary, otherwise the scoop neck will fall off the shoulder.

oops. don't cut too close to the seam because the fabric unravels and you'll be left with a real arm hole. i want to try the rolled hem function on my serger, too.

fully seamed bodice, minus all the buttons down the center back. i substituted two hook-and-eyes at the top and bottom just to hold the top together for fitting.

pretty!
ReplyDelete